How to Migrate WordPress Site to New Host (3 Safe Methods)
What You Need Before Migrating Your WordPress Site
Is It Safe to Migrate a WordPress Site to a New Host?
Yes migrating a WordPress site to a new host is completely safe when done correctly.
If you’re planning to migrate your WordPress site to a new host, it’s normal to feel nervous. You might worry about downtime, data loss, or losing your search rankings.
I had the same concerns the first time I moved a website.
But after migrating multiple WordPress sites across different hosting providers, I can confidently say this: most migrations go smoothly when you follow the right process.
In this guide, you’ll learn exactly how to migrate your WordPress site safely, avoid common mistakes, and protect your SEO during the transition.
What You Need Ready Before You Start the Migration
Before you start migrating your WordPress site, take a few minutes to prepare everything properly.
Most migration issues happen because people skip this step or rush through it. Having everything ready in advance will save you time and prevent unnecessary errors.
Use the checklist below to make sure nothing is missed.
The Quick Pre-Migration Checklist (Nothing Gets Missed)
Go through this list before you begin. Check each one off as you confirm it.
Access and Credentials
- Your current hosting account login (cPanel, hPanel, or dashboard)
- Your WordPress admin username and password
- Your domain registrar login (GoDaddy, Namecheap, or wherever you bought your domain)
- FTP credentials from your current host (only needed for the manual method)
New Hosting
- A new hosting plan already purchased and active
- Login details for your new hosting dashboard
- Name servers or server IP address from your new host welcome email
Backup
- A complete backup of your WordPress site saved to your computer
- This includes your database AND all your files
- Use UpdraftPlus or your hosting backup tool to create this
Never skip the backup step.
Even a small mistake during migration can break your website. A complete backup ensures you can restore your site instantly if anything goes wrong.
Think of it as your safety net simple to create, but critical when needed. During migration you will handle multiple sensitive credentials, so following WordPress security best practices when storing and managing these login details protects your site from unauthorized access.
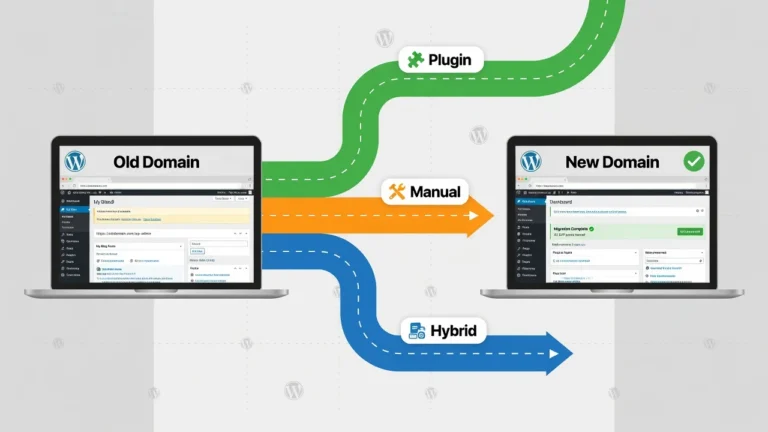
Which Migration Method Should You Use? (Pick Yours in 60 Seconds)
Choosing the right WordPress migration method depends on your technical skill level, website size, and how much control you want over the process.
Below is a quick breakdown to help you choose the best method for your situation.
Not every migration method works the same way for every person. The right choice depends on your technical comfort level, your site size, and how much time you have.
Here is a simple breakdown to help you decide right now.
| Method | Best For | Skill Level | Cost |
|---|---|---|---|
| Free Migration Service | Complete beginners | None required | Free with hosting |
| Migration Plugin | Most site owners | Beginner friendly | Free |
| Manual FTP Method | Advanced users | Intermediate | Free |
Free Migration Service: Best If You Hate Technical Steps
If you would rather have someone else handle the move, this is your method. You submit a request, give your old site details, and the hosting team does everything for you. No plugins, no FTP, no stress.
Migration Plugin: Best for Most WordPress Site Owners
This is the method I recommend for the majority of people reading this. You install a free plugin, export your site as a single file, and import it to the new host. The whole process takes about 30 to 60 minutes and requires zero coding knowledge.
Manual FTP Method: Best If You Are Comfortable With cPanel
This method gives you full control over every file and database. It takes longer and requires some technical confidence. I only recommend this if you have used FTP before or if a plugin cannot handle your site size.
Pick the method that fits you and jump to that section.
Method 1: Let Your New Host Migrate WordPress for You (Free)
This is the easiest way to migrate a WordPress site, especially for beginners.
You don’t need to install plugins, use FTP, or handle any technical setup. Your hosting provider manages the entire migration process for you.
This is the easiest method available. You do not install anything, configure anything, or touch a single file. Your new hosting provider handles the entire move while you wait.
Which Hosting Providers Include Free WordPress Migration
Several major hosting companies offer free WordPress migration as part of their hosting plans. Here are the most popular ones.
Hostinger offers free migration through their hPanel dashboard. You fill out a form and their team handles it within 24 hours.
SiteGround provides a free migration plugin and also offers manual migration assistance through their support team.
Bluehost offers one free website transfer for new customers when you sign up for a hosting plan.
Kinsta includes free professional migration for all new customers with their managed WordPress hosting plans.
Always check the conditions before you request. Some hosts limit the number of free migrations or exclude very large sites.
How to Request Free Migration on Hostinger Step by Step
I will use Hostinger as the example here since their process is the most straightforward.
- Log in to your Hostinger account and open hPanel
- Go to the Website section in your dashboard
- Click on Migrate Website
- Enter your old WordPress site URL
- Enter your old WordPress admin username and password
- Enter your old hosting provider login details if asked
- Submit the migration request
- Check your email for a confirmation from the Hostinger team
- Wait for the completion notification, which usually arrives within 24 to 48 hours
That is it. You do not need to do anything else until they notify you that the migration is complete.
What NOT to Do While the Migration Team Works
What You Should Avoid During Migration
This step is critical and often overlooked.
Avoid making any changes to your website while the migration is in progress. This includes publishing posts, updating plugins, or modifying themes. Changes made during this period may not transfer to the new server.
Also, do not cancel your old hosting account until you’ve fully tested your new site.
Keeping both versions active ensures you have a fallback option if anything goes wrong.
Method 2: Migrate Your WordPress Site Using a Free Plugin
For most website owners, using a WordPress migration plugin is the fastest and simplest solution.
It allows you to export your entire website and import it on a new host without dealing with technical configurations.
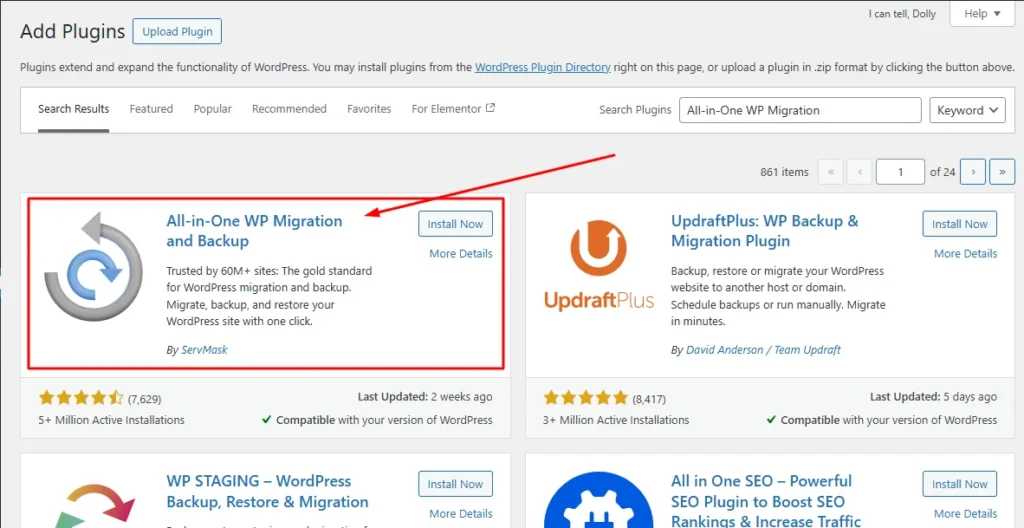
All-in-One WP Migration: Best for Sites Under 512MB
This plugin is my first choice for standard WordPress sites. It packages your entire site into a single file and lets you import it with just a few clicks.
Part A: Export From Your Old Site
- Log in to your old WordPress dashboard
- Go to Plugins and click Add New
- Search for All-in-One WP Migration and install it
- Activate the plugin and click on it in the left menu
- Click Export and then choose Export to File
- Wait for the export to finish and download the .wpress file to your computer
Part B: Set Up WordPress on Your New Host
- Log in to your new hosting dashboard
- Install WordPress using Softaculous or your host’s auto-installer
- Once WordPress is installed, log in to the new WordPress dashboard
- Go to Plugins and install All-in-One WP Migration on the new site
Part C: Import to Your New Site
- Click All-in-One WP Migration in the left menu
- Click Import and upload your .wpress file
- Wait for the import to complete. This may take a few minutes depending on your site size
- When prompted, click Save Permalinks
After the import is complete, go to Settings → Permalinks and click Save Changes twice without modifying anything.
This step rebuilds your .htaccess file and prevents common issues like 404 errors across your site.
Log in using your old WordPress username and password since the import replaces everything including your login credentials.
Migrate Guru: The Only Free Tool That Handles 100GB+ Sites
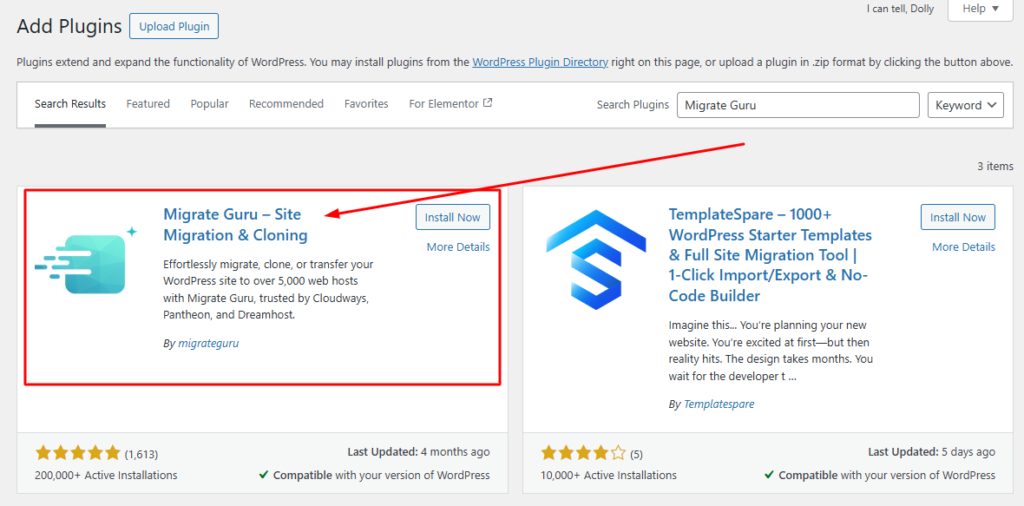
If your site is large, All-in-One WP Migration will hit its file size limit. Migrate Guru solves this completely.
What makes Migrate Guru different is how it works. Instead of using your server’s resources to move the data, it routes everything through external BlogVault servers. This means your site stays fast and stable during the entire process. No timeouts, no crashes.
Here is how to use it.
- Install Migrate Guru on your old WordPress site
- Install Migrate Guru on your new WordPress site
- On the new site, copy the Migration Key shown on the plugin page
- Go back to your old site and open Migrate Guru
- Enter the Migration Key and your email address
- Click Migrate and wait for the confirmation email
The plugin handles everything from that point. For a 125GB site this process takes around 15 hours. Smaller sites finish much faster. You will receive an email when the migration is complete.
WP Vivid Backup: Migrate Using the Backup and Restore Method
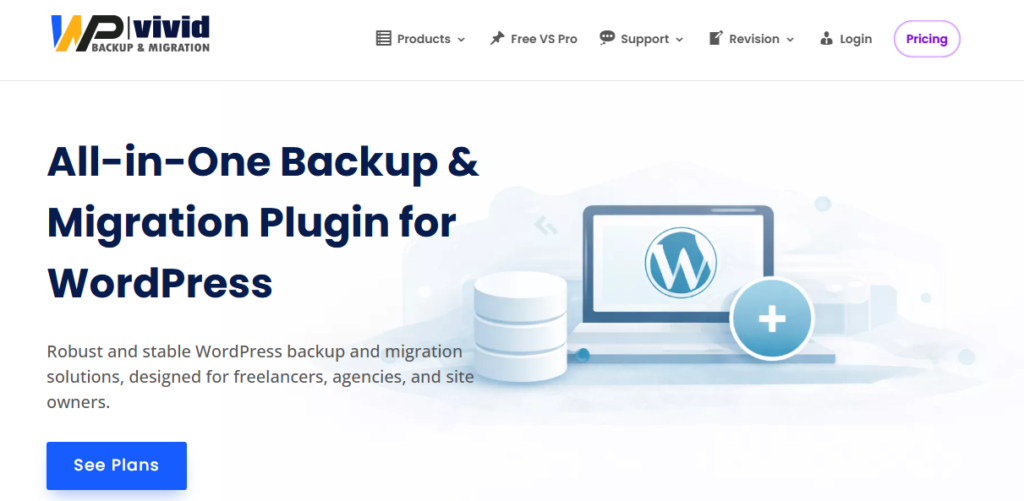
WP Vivid takes a slightly different approach. It creates a backup of your site first and then restores that backup on the new host. Many people prefer this method because it also gives them a usable backup they can keep.
- Install WP Vivid on your old WordPress site
- Click Backup Now and wait for it to finish
- Download the backup files to your computer
- Set up a fresh WordPress installation on your new host
- Install WP Vivid on the new WordPress site
- Go to the Restore tab and upload your backup files
- Click Restore and wait for the process to complete
Helpful tip: Before you update your DNS, use a VPN set to a different country to check if your new site is loading correctly. This lets you verify everything looks right before the domain officially points to the new server. Beyond full site migration, you might also need to handle importing external content from other platforms or data sources into your WordPress site.
Method 3: How to Manually Migrate WordPress Without Any Plugin
The manual WordPress migration method gives you full control over your website files and database.
However, it requires basic knowledge of FTP and database management. This method is best suited for developers or users handling large or complex websites.
Export Your WordPress Database From the Old Host
Your database holds everything: posts, pages, settings, comments, and user accounts. This is the most important file to get right.
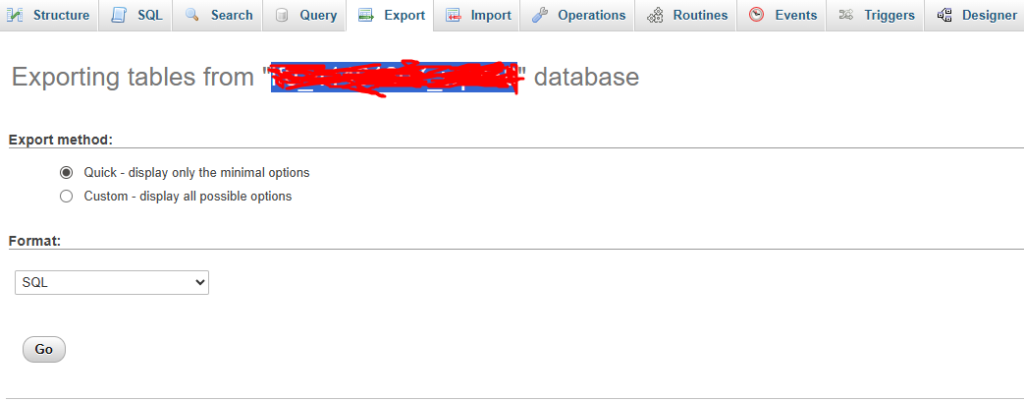
- Log in to your old hosting cPanel
- Scroll down and click on phpMyAdmin
- In the left panel, click on your WordPress database name
- Click the Export tab at the top
- Choose Quick as the export method
- Select SQL as the format
- Click Go and save the .sql file to your computer
Keep this file safe. It is the heart of your entire website.
Download All WordPress Files Using FileZilla
FileZilla is a free FTP client that lets you connect to your hosting server and download your files directly.
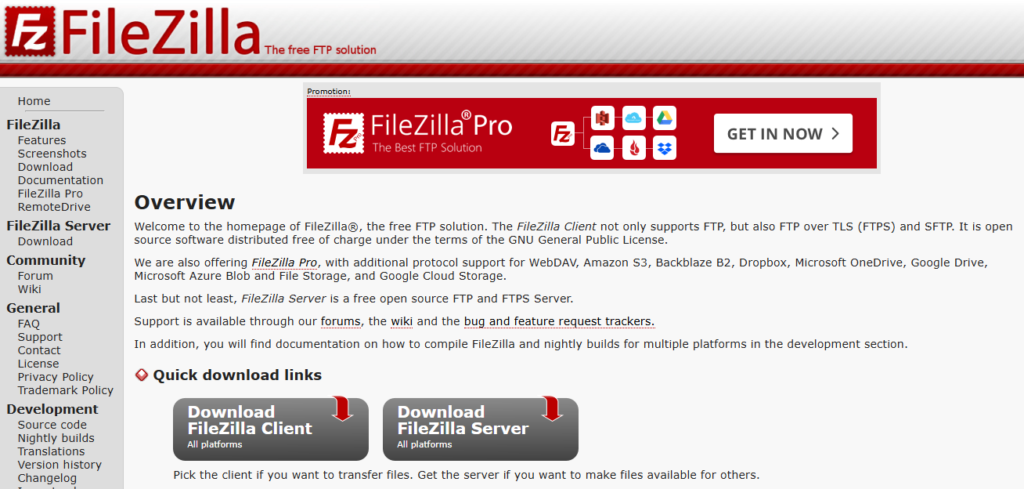
- Download and install FileZilla on your computer
- Open your old hosting cPanel and find FTP Accounts or FTP credentials
- Enter the host, username, password, and port 21 into FileZilla
- Click Quickconnect to connect to your old server
- In the right panel, navigate to the public_html folder
- Select all files and folders inside public_html
- Drag them to a folder on your computer and wait for the download to finish
Depending on your site size this could take anywhere from a few minutes to over an hour. Large sites with lots of images take the longest.
Upload Your Files and Import the Database to the New Host
Now you move everything to the new server.
Upload files via FTP:
- Connect FileZilla to your new hosting account using the new FTP credentials
- Navigate to the public_html folder on the new server
- Select all the files you downloaded from your old site
- Upload them to the new public_html folder
Create and import the database:
- Log in to your new hosting cPanel
- Go to MySQL Databases and create a new database
- Create a new database user and assign all privileges to it
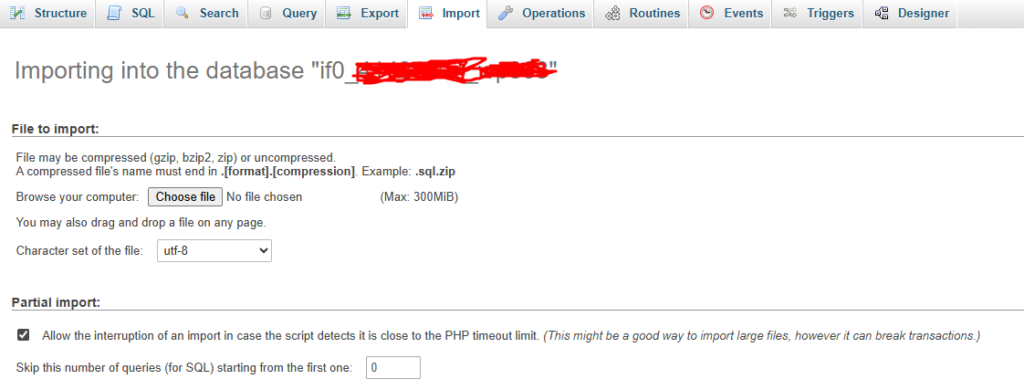
- Open phpMyAdmin on your new host
- Click on your new database in the left panel
- Click the Import tab
- Upload your .sql file and click Go
Update wp-config.php So WordPress Connects to the New Database
Your wp-config.php file tells WordPress which database to connect to. After migration it still has your old database details so you need to update them.
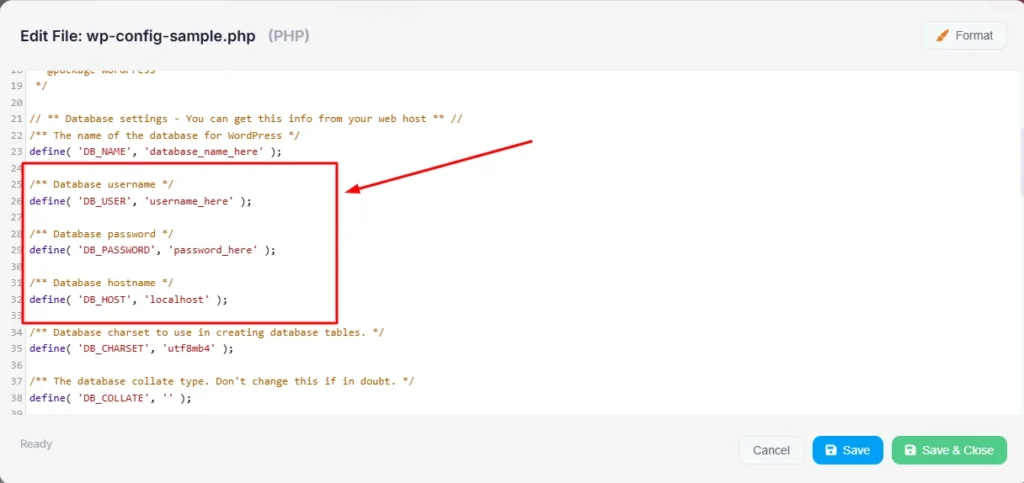
- Find wp-config.php in your uploaded files using FileZilla
- Right-click and choose View or Edit to open it
- Find these four lines and update them with your new database details:
define('DB_NAME', 'your_new_database_name');
define('DB_USER', 'your_new_database_user');
define('DB_PASSWORD', 'your_new_database_password');
define('DB_HOST', 'localhost');- Save the file and re-upload it to your new server via FTP
Once this is done your WordPress site should load on the new server.
How to Point Your Domain to the New Host After Migration
After migrating your website, your domain still points to your old hosting server.
To complete the migration, you need to update your DNS settings so visitors are directed to your new host.
Update Your Name Servers (The Standard Method)
This is the method I use most often. It transfers full DNS control to your new host.
- Log in to your domain registrar account (GoDaddy, Namecheap, or wherever you registered your domain)
- Find your domain and open its DNS settings
- Look for the Name Servers section
- Replace the existing name servers with the ones provided by your new host
- Save the changes
Your new hosting welcome email or dashboard will show you the correct name servers. They usually look something like ns1.hostinger.com and ns2.hostinger.com.
DNS propagation after this change takes between 24 and 48 hours globally.
Update Just the A Record (Faster Option)
If you want a faster update without changing your full name server setup, you can update only the A Record.
- Get your new hosting server’s IP address from your welcome email or hosting dashboard
- Log in to your domain registrar
- Go to DNS Management and find the A Record for your domain
- Replace the existing IP address with your new server’s IP address
- Save the changes
A Record updates often propagate in as little as 1 to 4 hours, which is faster than a full name server change.
How to Confirm Your Domain Is Pointing to the Right Place
Do not guess. Use these two methods to verify.
Go to whatsmydns.net, enter your domain name, and select A Record. You will see a map showing which locations around the world have received the updated DNS. Wait until most locations show your new server IP before cancelling your old hosting.
You can also use a VPN app on your phone, connect to a server in a different country, and visit your domain in the browser. If you see the new site loading correctly you know the DNS has propagated in that region.
Keep your old hosting account active for at least seven days after full propagation. You want a safety net in case anything needs to be fixed.
Don’t Switch Hosts Until You Read This: Protecting Your SEO
Most migration guides ignore SEO but this is where many websites lose rankings.
A poorly executed migration can impact your search visibility. However, when done correctly, your rankings should remain stable. Before you begin the migration process, perform a complete SEO audit to document your current rankings, backlinks, and site structure so you can verify nothing was lost after the move.
Follow these steps to protect your SEO during the migration process.
5 SEO Steps to Take Before You Touch Anything
1. Export your XML sitemap Go to your old site and open yoursite.com/sitemap.xml. Save this file. You will need it to resubmit to Google Search Console after migration.
2. Crawl your old site Use a free tool like Screaming Frog (up to 500 URLs free) to crawl your old site. Export the list of all URLs. This is your reference point for checking nothing breaks after migration.
3. Screenshot your Google Search Console data Open Google Search Console and take screenshots of your current performance, top queries, and top pages. You want a before-and-after comparison.
4. Document all existing 301 redirects If your old site has any redirects set up (in .htaccess or a plugin), copy them all down. They need to be recreated exactly on the new host.
5. Note your current meta titles and descriptions Check that your SEO plugin (Yoast, RankMath) settings transferred correctly after migration. Verify your keyword optimization is intact by spot-checking five to ten important pages to ensure target keywords, meta descriptions, and title tags match your pre-migration documentation.
5 SEO Checks to Run the Day Your New Site Goes Live
1. Submit your sitemap to Google Search Console Log in to Google Search Console, go to Sitemaps, and submit your sitemap URL. This tells Google where to find your content on the new server.
2. Verify robots.txt is not blocking Google Visit yoursite.com/robots.txt and check there is no line that says Disallow: /. This line blocks all search engine crawlers and sometimes gets switched on accidentally during migration.
3. Confirm HTTPS is working Check that your SSL certificate is active on the new host. Your site should load with https:// and show a padlock in the browser. Contact your new host if SSL is not set up yet.
4. Run a speed test Use Google PageSpeed Insights or GTmetrix to test your site speed on the new host. It should be equal to or better than your old host. Speed is a ranking factor and a bad host can hurt you.
5. Monitor Google Search Console for 14 days Check the Coverage report and Performance report daily for the first two weeks. You are looking for any new crawl errors, drops in impressions, or pages that suddenly disappeared from the index.
Run This Checklist After Migrating Your WordPress Site
Once your website is live on the new host, it’s important to verify that everything is working correctly.
Use this checklist to identify and fix any issues before your visitors notice them.
Site and Content
- Site loads correctly on desktop, mobile, and tablet
- All pages and posts display without errors (migration is also a good time to consider upgrading your theme if you’ve been planning a redesign)
- All images appear without broken icons
- Internal links work and do not redirect to the old host
Functionality
- Contact forms submit successfully and you receive the test email
- Any WooCommerce or ecommerce checkout completes without errors
- Search function works on the site
- Comments section displays correctly if enabled
Admin and Technical
- WordPress admin dashboard is accessible with your login
- All plugins are active and functioning
- SSL certificate is active and HTTPS loads correctly
- Google Analytics is tracking visitors in real time
Post-Migration Safety
- Old hosting account is still active (keep it for at least 7 days)
- Local backup of the old site is saved on your computer
- New host backup is scheduled and active
If you find anything on this list that is not working, address it before promoting the site or sharing new content. Most issues are small and fixable in under ten minutes.
WordPress Migration Went Wrong? Fix These 5 Common Errors
Even with careful planning, WordPress migration issues can still occur.
Below are the most common problems after migration and how to fix them quickly.
White Screen of Death After Migration
What you see: A completely blank white page when you visit your site or dashboard.
Why it happens: This is usually caused by a PHP memory limit being too low on the new host or a plugin conflict after the move.
How to fix it: Connect to your new server via FTP and open wp-config.php. Add this line just before the line that says “That’s all, stop editing”:
define('WP_MEMORY_LIMIT', '256M');Save and re-upload the file. If the white screen continues, navigate to wp-content/plugins via FTP and rename the plugins folder to plugins-disabled. This deactivates all plugins at once.
If your site loads, the issue is a plugin conflict. Rename the folder back and reactivate plugins one at a time to find the problem. For additional solutions if these steps don’t resolve the issue, see our complete guide to troubleshoot WordPress critical errors.
“Error Establishing a Database Connection”
What you see: A specific error message saying WordPress cannot connect to the database.
Why it happens: The database credentials in your wp-config.php file do not match the new database you created on the new host.
How to fix it: Open wp-config.php via FTP and check these four values carefully:
DB_NAME: Must match the exact name of your new database
DB_USER: Must match the database username you created
DB_PASSWORD: Must match the password for that user
DB_HOST: Usually 'localhost' but check with your new host
Even one incorrect character will cause this error. Copy and paste the values directly from your hosting dashboard to avoid typos. If you’ve verified all credentials are correct and the error persists, check our complete guide to fixing database connection errors for advanced troubleshooting steps including database corruption and server configuration issues.
Images Are Missing or Broken After Migration
What you see: Broken image icons across your site where photos and graphics should appear.
Why it happens: Media files were not fully transferred during migration or the file paths stored in the database do not match the new server structure.
How to fix it: First check your FTP connection and confirm the wp-content/uploads folder transferred completely. If files are missing, re-upload that folder.
If the files are present but still not showing, install the free Regenerate Thumbnails plugin, run it, and let it rebuild all image sizes. This fixes most image display issues after migration.
404 Errors or Redirect Loops on Every Page
What you see: Every page on your site shows a 404 error or keeps redirecting in a loop.
Why it happens: The permalink structure was not rebuilt after migration. This is a very common issue after using All-in-One WP Migration.
How to fix it: Log in to your WordPress dashboard and go to Settings then Permalinks. Do not change any settings. Just click Save Changes. Then click Save Changes a second time. This forces WordPress to regenerate the .htaccess file with the correct rewrite rules.
This fix takes about 30 seconds and solves the problem in almost every case.
Website Still Shows the Old Host Version
What you see: You update the DNS but your site still looks like it did on the old host.
Why it happens: Either the DNS has not fully propagated yet or your browser is showing you a cached version of the old site.
How to fix it: Start by clearing your browser cache completely. In Chrome, press Ctrl + Shift + Delete and clear all cached images and files.
Then go to whatsmydns.net, enter your domain, and check the A Record. If most locations still show the old IP address, DNS propagation is simply not finished yet. Wait a few more hours and check again. Full propagation can take up to 48 hours.
Do not panic during this window. Both the old and new sites are live simultaneously while DNS updates globally. This is completely normal.
Frequently Asked Questions About Migrating WordPress
Will my website go down during migration?
The migration itself and the DNS update are two separate timelines. The actual file and database migration takes 30 to 90 minutes with a plugin, 2 to 4 hours manually, or 24 to 48 hours if you use the free migration service. DNS propagation after updating your name servers adds another 24 to 48 hours. Your site does not go fully offline during this time. The old site stays live while the new one catches up globally.
Will my website go down when I switch hosting providers?
Not completely. During DNS propagation some visitors will see the old site and some will see the new one depending on which DNS server their device is using. The cleanest way to avoid any visible disruption is to keep your old hosting active until propagation is complete, test the new site thoroughly before switching DNS, and make the switch during your lowest traffic hours.
Do I need to reinstall WordPress on the new host before migrating?
It depends on your method. If you use the free migration service, your new host handles everything and you do not need to install anything first. If you use a plugin like All-in-One WP Migration or WP Vivid, you need a fresh WordPress installation on the new host before you can import your files. After migration, you may need help reinstalling specific plugins that require special configuration or setup steps. For the manual FTP method, yes you also need WordPress installed first.
Can I migrate WordPress to a new host without losing my domain?
Yes, absolutely. Your domain name and your hosting are two separate things. When you migrate, only the hosting changes. Your domain stays the same. You simply update the name servers or A Record at your domain registrar to point your existing domain toward the new server. No one needs to visit a different URL.
What happens to my WordPress emails when I switch hosts?
If you use email accounts created through your hosting provider (like info@yoursite.com through cPanel), you will need to recreate those accounts on your new host and update your email client settings. If you use external email services like Gmail, Zoho Mail, or Mailchimp for transactional emails, nothing changes. Just confirm your MX records are correctly set at your domain registrar after the migration.
Can I undo the migration if something goes wrong?
Yes. This is why I always say keep your old hosting active for at least 7 to 14 days after migration. If something goes seriously wrong on the new site, simply log in to your domain registrar and change the name servers back to your old host. Your old site comes back online within a few hours. Always keep your pre-migration backup file on your computer as a second safety net.
Which WordPress Migration Method Is Right for You?
You now have everything you need to move your WordPress site to a new host safely and confidently.
Migrating your WordPress site to a new host may feel overwhelming at first, but it becomes straightforward when you follow the right steps.
Whether you choose a migration service, plugin, or manual method, the key is preparation.
Always create a full backup, test your new site before switching DNS, and keep your old hosting active until everything is verified.
Once completed, your website will run on a better hosting environment without losing data, traffic, or rankings.