

If you run a WordPress website, there is one thing I want you to check right now. Open your browser and type your domain followed by /wp-login.php. Did it load a login page? That means anyone in the world including every automated bot and bad actor scanning the internet can find your WordPress login page just as easily as you did.
I learned this the hard way in early 2023 when I checked my server access logs on a client’s WooCommerce site hosted on SiteGround. The logs revealed hundreds of failed login attempts every single day, all targeting the default login URL. Bots were hammering the wp-login.php page around the clock without pause. That experience pushed me to change the WordPress login URL without a plugin, using nothing but a file manager and careful editing.
In this guide, I will walk you through every step of the process I follow, the mistakes that cost me hours of recovery work, and how you can hide your WordPress login page safely on your own site.
Why Your Default WordPress Login URL Is a Security Risk
Every standard WordPress installation shares the exact same login address. This is one of the first things hackers and automated bots target when scanning for vulnerable websites.
Every standard WordPress installation shares the exact same login address. This means anyone including automated bots can access the login page without any effort. This is one of the first things hackers and automated bots target when scanning for vulnerable websites.
By simply changing this single entry point, you eliminate a significant portion of unauthorized access attempts before they even begin. If you want to go deeper on protecting your site from the ground up, my full guide on WordPress security best practices covers every layer worth knowing.
How Brute Force Attacks Target wp-login.php
A brute force attack works through sheer volume. An automated script cycles through thousands of username and password combinations, running around the clock until it stumbles on a valid pair. There is nothing sophisticated about the technique, which is exactly what makes it so dangerous. It requires zero skill, costs almost nothing to execute, and WordPress does absolutely nothing to block it by default.
In March 2025, I reviewed the access logs of a client’s business site and counted 837 failed POST requests to wp-login.php within a single hour between 2:00 and 3:00 AM UTC. Three different IP ranges were responsible, and none of those requests came from a real human being. Every single one was automated.
The security risk is only half the problem. Those constant login requests also consume server resources, slow down page load times for legitimate visitors, and can even trigger resource limit warnings from your hosting provider. Changing the default WordPress login URL stops the vast majority of this traffic immediately because most bots are programmed to scan for /wp-login.php specifically. When that path returns nothing useful, they move on to an easier target.
Why Hiding Your Login Page Is the Easiest First Defense
Renaming your login file will not make your site bulletproof. What it does is remove the single most targeted entry point from public view, which stops the majority of automated attacks before they start.
Layer this change with two-factor authentication and a login attempt limiter and you have eliminated most of the risk surface bots rely on.
Layer this change with two-factor authentication and a login attempt limiter and you have eliminated most of the risk surface bots rely on. These three measures working together are the most practical way to secure your WordPress login without overcomplicating your setup. The login page still exists. It just no longer advertises itself to every scanner on the internet.
The login page still exists. It just no longer advertises itself to every scanner on the internet.
Should You Use the Manual Method or a Plugin
Before diving into the tutorial, you should decide which approach fits your skill level and comfort zone. Both methods achieve the same result, but they differ in maintenance requirements and technical involvement.
When the Manual Method Makes Sense
The manual method works best if you are comfortable editing PHP files, you understand how Find and Replace works inside a code editor, and you want zero plugin overhead on your site. It is also a strong choice for developers managing multiple client sites who prefer clean, dependency-free configurations.
After doing this a few times, the whole process takes under ten minutes. The catch and it is a real one is that WordPress core updates replace the files you edited. I cover how to handle that further down.
When a Plugin Is the Better Choice
Never edited a PHP file before? Skip the manual method entirely. WPS Hide Login does the same thing with zero file editing. I recommend it to every non-technical client I work with, and it has never caused a single issue.
A plugin like WPS Hide Login handles all file references automatically, includes a safety mechanism in case you forget your new URL, and survives WordPress core updates without any manual intervention. You install it, enter your preferred login URL in the settings panel, and you are done.
I will cover WPS Hide Login briefly near the end of this guide for anyone who decides the manual route is not the right fit. If you would prefer a dedicated walkthrough, I have a separate guide that shows you how to change your WordPress login URL using a plugin step by step.
What You Need Before You Start
Spending five minutes on preparation will save you hours of frustration if something goes wrong. Do not skip this section.
Access to Your Hosting File Manager or FTP
You need direct access to your website files. Most hosting providers include a File Manager inside their control panel — whether that is cPanel, Plesk, or a proprietary dashboard. The File Manager works like a folder browser and lets you open, edit, rename, and download files directly through your web browser.
If your host does not offer a built-in File Manager, you can use an FTP client like FileZilla instead. Your hosting provider can supply the FTP credentials you need to connect.
For quick edits like this, I personally prefer the File Manager because it eliminates the need for additional software and lets me work directly in the browser.
A Complete Backup of Your Website
Before you change anything, create a full backup that includes both your files and your database. This is not optional, and I will explain why with a real example.
Early in my freelance career, I was modifying general-template.php on a client’s site and accidentally deleted a closing bracket while making my edits. The entire site went white — if you ever find yourself in that situation, here is exactly how to fix a WordPress critical error without losing your mind — and in that case I had no admin access to fix it from the dashboard.
The most recent backup was a week old, which meant seven days of blog posts, WooCommerce orders, and plugin configurations were at risk. That mistake cost me an entire weekend of manual recovery work.
If you are using a managed host like SiteGround, Cloudways, or Kinsta, you likely have one-click backup functionality in your dashboard. If not, a free plugin like UpdraftPlus can create a complete backup in minutes. Either way, verify that the backup exists and is downloadable before proceeding.
Your WordPress Version
The exact number of internal references inside wp-login.php can vary slightly between WordPress versions. Knowing your version helps with troubleshooting if something does not match what I describe in the steps below.
You can check your version by logging into your dashboard and navigating to Dashboard then Updates. Write it down or take a screenshot.
What Actually Happens When You Change the Login URL
A lot of people hesitate because they worry about breaking their site. That concern is completely valid, so let me explain exactly what changes and what stays the same.
Does Renaming wp-login.php Break Anything
If you follow every step correctly, nothing breaks. The critical detail most people miss is that wp-login.php contains internal references to its own filename. When you rename the file, those references still point to the old name unless you manually update them.
On my first attempt years ago, I renamed the file but forgot to update the self-references inside it. The login page loaded fine, but the logout button stopped working because WordPress could not find the file it was trying to redirect to. Once I opened the renamed file and replaced every instance of the old filename, everything worked perfectly.
What Happens to /wp-admin After the Change
When someone who is not logged in visits /wp-admin on a standard WordPress installation, they get redirected to wp-login.php for authentication. After you rename wp-login.php, that redirect target no longer exists.
The exact behavior depends on your server configuration and any security plugins you have installed. In most cases, visitors hitting /wp-admin will encounter a redirect error or a default server error page rather than a clean 404.
If you want unauthenticated visitors to see a proper 404 page when they try /wp-admin, you may need to add a redirect rule in your .htaccess file. If you also want to control where WordPress redirects users after login, I have a separate guide covering that configuration in full.
The important point is that the default login path becomes a dead end, which is exactly the outcome you want.
Will WordPress Core Updates Overwrite Your Changes
Yes, and this is the single most important limitation of the manual method. When WordPress releases a major core update, it replaces core files including wp-login.php and the contents of wp-includes. This means your renamed file will still exist, but a fresh copy of the original wp-login.php will also appear alongside it.
After every major WordPress update, you need to check whether a new wp-login.php has been created and either delete it or rename it again. You should also verify that your changes inside general-template.php are still intact.
This maintenance requirement is the main reason some people prefer the plugin approach. If you choose the manual method, I recommend adding a reminder to your calendar for the week after each major WordPress release.
How to Change WordPress Login URL Without a Plugin
Here is the exact process I follow every time I set up a new WordPress site or secure an existing one. It works consistently across cPanel, Plesk, and custom hosting dashboards. Follow each step in order.
Step 1: Open Your Hosting File Manager
Log into your hosting control panel and locate the File Manager. Once inside, you should see a directory tree on the left side showing your website’s file structure.
Navigate to the public_html folder (sometimes called www or htdocs depending on your host). This is the root directory where your WordPress installation lives.
Step 2: Find wp-login.php
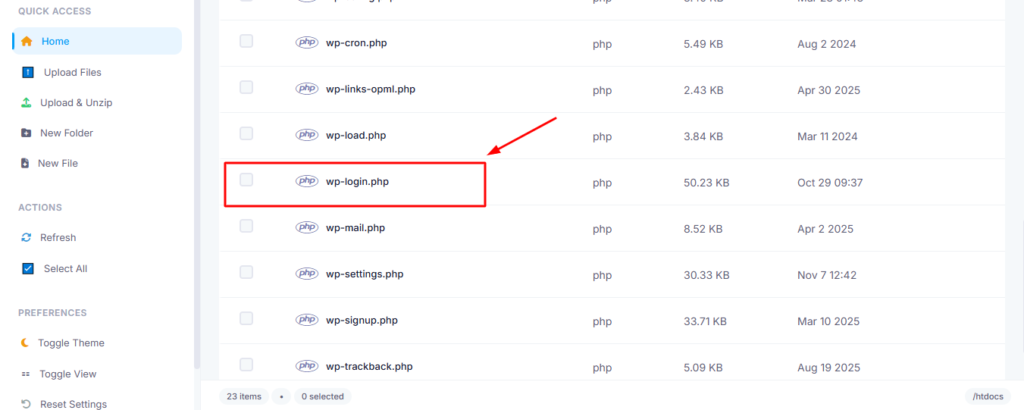
Inside public_html, look for wp-login.php alongside other familiar WordPress files like wp-config.php, wp-settings.php, and the wp-content folder.
If you cannot see it immediately, check whether hidden files are visible. Most File Managers have a settings toggle to show hidden files enable it if needed.
Step 3: Download a Backup Copy of the File
Right-click on wp-login.php and download it to your computer before making any changes. This gives you a quick restore option for this specific file without needing to restore your entire site backup.
I keep a dedicated folder on my desktop called “WP-File-Backups” and drop every file there before editing. It takes ten seconds and has saved me multiple times.
Step 4: Rename wp-login.php to Your Custom Filename
Right-click on wp-login.php and select the rename option. Choose a new name that is unique, not easy to guess, and ends in .php.
Strong examples:
- myportal-access.php
- secure-entry-2024.php
- company-dashboard.php
Avoid these bots sometimes scan for them:
- admin-login.php
- secret-login.php
- hidden-login.php
- new-login.php
Write down your new filename immediately. Store it in a password manager, a secure note, or anywhere you will not lose it. If you forget this URL, you will need to access your files through FTP or File Manager to find the renamed file.
Step 5: Replace All Internal References Inside the Renamed File
This is the most important step and where most people make mistakes.
Open your newly renamed file by right-clicking it and selecting Edit or Code Editor. Inside, you will see PHP code that contains multiple references to the original filename “wp-login.php.”
Use the Find and Replace function (Ctrl+H on Windows, Command+H on Mac). In the “Find” field, enter:
wp-login.phpIn the “Replace” field, enter your new filename. For example:
myportal-access.phpThe file typically contains between 12 and 20 instances of “wp-login.php” depending on your WordPress version. Replace all of them not just the first one. Most editors have a “Replace All” button that handles this in one click.
What you are looking for inside the file references appear in contexts like these:
PHP// Redirect to wp-login.php
// References in form actions pointing to wp-login.php
// URL construction strings containing wp-login.php
After replacing every instance, save the file.
Step 6: Edit general-template.php in wp-includes
Navigate to the wp-includes folder inside public_html. Find the file called general-template.php and open it for editing.
This file controls what happens after login and logout actions. Specifically, it tells WordPress where to redirect users when they log out. If this file still references wp-login.php after you have renamed it, the logout process will break users will see an error instead of being redirected to the login page.
Search for wp-login.php inside general-template.php. You will typically find two to four instances depending on your WordPress version. Replace all of them with your new custom filename.
Critical warning: Change only the wp-login.php references in this file. Do not modify anything else. general-template.php controls numerous core WordPress functions, and editing the wrong line can break features completely unrelated to the login page.
Save the file when you are finished.
Step 7: Clear All Caches
If your site uses any caching mechanism whether that is a plugin like WP Super Cache, W3 Total Cache, or LiteSpeed Cache, or server-level caching provided by your host purge all caches now.
Also clear your browser cache, or open a private/incognito browsing window for testing. Cached versions of the old login page can persist and cause confusion during verification.
Step 8: Test Everything Thoroughly
Open a new browser tab (preferably in incognito mode) and run these tests in order:
Test 1 Old URL should fail:
Type yourdomain.com/wp-login.php. You should see an error page or a 404. If the login page still appears, your cache may not be fully cleared, or the original file may still exist alongside your renamed version.
Test 2 New URL should work:
Type yourdomain.com/your-new-filename.php. Your login page should appear normally.
Test 3 Login functionality:
Enter your credentials and log in. Verify that the dashboard loads correctly and all admin functions work as expected.
Test 4 Logout functionality:
Click the logout link in the top-right corner of the dashboard. You should be redirected to your new login URL with a confirmation message. If you see an error here, the references in general-template.php were not updated correctly.
Test 5 wp-admin redirect:
While logged out, try visiting yourdomain.com/wp-admin. It should not display a login page. Depending on your server configuration, you may see a redirect error or a 404 page.
If all five tests pass, your custom WordPress login URL is fully operational.
Common Mistakes That Break Your Site
I have made several of these mistakes personally, and I have seen them repeatedly in WordPress forums. Knowing what to watch for will save you real time.
Updating wp-login.php but Forgetting general-template.php
This is the most common error by far. The login page works, but the logout function breaks because WordPress still tries to redirect to a file that no longer exists under the old name. Always update both files as a pair.
Accidentally Editing Other Code in general-template.php
When you open general-template.php, you are working inside a file that controls dozens of core WordPress functions. If you accidentally delete a bracket, remove a line, or change a variable name while searching for wp-login.php references, you can break parts of your site that have nothing to do with the login system — in some cases triggering an HTTP 500 error that takes your entire site offline.
My advice: use only the Find and Replace function. Do not scroll through the file making manual changes. Let the search tool find exactly what you need, replace it, and close the file.
Forgetting to Clear Cache After Making Changes
Server and browser caches can serve the old login page for hours or even days after you have renamed the file. If your tests show the old URL still working, clear every cache layer before assuming something went wrong with your file edits.
Not Accounting for WordPress Core Updates
This deserves repeating because it catches people off guard. After a major WordPress update, check your public_html folder. If a fresh wp-login.php has appeared, you need to either delete it or repeat the renaming process. Also recheck general-template.php since core updates can restore it to its default state.
WordPress Login Security Best Practices Beyond the URL Change
Changing your login URL eliminates most automated traffic targeting your login page. But for comprehensive WordPress login security, combine it with these additional measures.
Enable Two-Factor Authentication
Two-factor authentication ensures that even if someone obtains your password, they cannot complete the login process without a verification code sent to your phone or email. Free plugins like WP 2FA and Google Authenticator add this functionality in minutes.
I enable two-factor authentication on every WordPress site I manage, without exception. It is the single most effective login protection available.
Limit Failed Login Attempts
WordPress allows unlimited login attempts by default, which is what makes brute force attacks possible in the first place. A plugin like Limit Login Attempts Reloaded will automatically lock out any IP address that exceeds a set number of failed attempts within a defined time window.
This works as a perfect complement to your custom login URL. The renamed URL reduces the number of bots that discover your login page, and the attempt limiter neutralizes any that do find it.
Replace the Default Admin Username
If your administrator account still uses “admin” as the username, change it now. That is the first username every automated attack script tries by default.
WordPress does not allow direct username changes from the dashboard. The cleanest method is to create a new administrator account with a unique, non-obvious username, log in with the new account, transfer ownership of any existing content, and then delete the old “admin” account.
Verify Your SSL Certificate Is Active
If your site still loads over HTTP instead of HTTPS, your login credentials are being transmitted in plain text. I have seen this on live WooCommerce stores processing real payments the fix takes five minutes through most hosting dashboards, and most hosts offer free SSL through Let’s Encrypt.
Most modern hosting providers offer free SSL certificates through Let’s Encrypt, often with one-click installation. If your site URL still shows “http” instead of “https,” contact your host and have SSL activated before implementing any other security changes.
Consider a Web Application Firewall
On client sites that process payments, I add Cloudflare’s free tier as a front-line filter. It blocks malicious requests before they touch the server, which means your renamed login file and your entire site get an extra shield at zero cost.
Using WPS Hide Login as an Alternative
If you read through the manual method and decided it is not the right approach for your situation, WPS Hide Login is the plugin I recommend most often.
After installing and activating it, navigate to Settings then General and scroll to the bottom of the page. You will see two new fields:
- Login URL: Enter your preferred custom login path (for example, “my-secret-login”)
- Redirection URL: Enter the URL where visitors should be sent if they try the old /wp-login.php path (typically a 404 page)
Save your settings and you are done. The plugin weighs almost nothing in terms of performance impact, survives core updates automatically, and can be reversed instantly by deactivating it.
Frequently Asked Questions
Can I change the WordPress login URL without a plugin?
Yes. The process involves renaming wp-login.php to a custom filename, updating all internal self-references within that file, and updating the corresponding references inside wp-includes/general-template.php. This guide covers every step in detail.
What if I forget my new login URL?
Access your website files through your hosting File Manager or an FTP client. Look inside the public_html folder for the renamed PHP file it will be the file you created during this process. If you used the WPS Hide Login plugin instead, you can also retrieve the custom URL from your database through phpMyAdmin by searching the options table.
Does changing the login URL protect against all hacking attempts?
No, and I want to be straightforward about that. A custom login URL removes your site from most automated attack lists and eliminates the majority of brute force bot traffic. However, it is not a standalone security solution. For meaningful protection, combine it with a strong unique password, two-factor authentication, login attempt limiting, an active SSL certificate, and regular backups.
Does this method work on all hosting providers?
The manual method works on any host that gives you file-level access to your WordPress installation, whether through a File Manager, FTP, or SSH. The only requirement is the ability to rename and edit files within public_html. If your host restricts direct file access, the plugin method will still work because it operates entirely within the WordPress dashboard.
How do I revert to the default login URL?
For the manual method, reverse every step. Rename your custom file back to wp-login.php and replace all instances of your custom filename inside both wp-login.php and general-template.php with the original “wp-login.php” text. For the plugin method, simply deactivate WPS Hide Login and the default login URL is restored immediately.
Will this affect other users or team members on my site?
Yes. Once you change the login URL, every user who needs to log in must use the new address. Make sure you communicate the new URL to all editors, authors, administrators, and anyone else with login access before making the change. The old bookmarks they may have saved for the login page will stop working.
Final Thoughts
Changing your WordPress login URL takes less than fifteen minutes, costs nothing, and delivers an immediate measurable reduction in unauthorized access attempts. It is one of the first things I configure on every new WordPress installation, and the server logs consistently confirm its effectiveness.
Personally, I use the manual method on client sites where I control the update cycle and the plugin method on sites where the owner manages updates themselves. Pick whichever matches your workflow — the security benefit is identical.
After securing your login URL, set up two-factor authentication, limit failed login attempts, verify your SSL is active, and make sure your admin username is not “admin.” After securing your login URL, set up two-factor authentication, limit failed login attempts, verify your SSL is active, and make sure your admin username is not ‘admin.’
Keep all plugins and themes updated as well, since outdated software is one of the most common entry points for attackers. Those steps combined with a custom login URL put your WordPress security well ahead of the vast majority of sites on the internet.
Most WordPress site owners have never checked whether their login page is publicly visible — and most would be alarmed to discover it is. If this guide helped you lock yours down, pass it along. One shared link could save someone else from a compromised site.


